First off, we have been working like mad on Chuck, as work on the road is a pain. However, it is important to note, that a simple job always becomes 2 simple jobs. They are like rabbits, these jobs seem to collude overnight to breed more of themselves...
What started the most recent round of tasks, was the decisions (seemingly harmless) to ditch our trailer. While our piece-O-junk®© Harbor Freight Trailer has stopped falling to pieces as of late, we are tired of the hindrance to our mobility. In addition I do not think it would survive 5,000 miles of crappy Central American roads.
Despite how simple it would seem, getting rid of the piece-O-junk®© is no simple task. First off, we cannot simple leave its contents behind, nor can we just toss them into the van. Our current van storage is near max capacity. Thus in order to accommodate even further stores we must undertake Storage-mod Supermax Ultra 2013©.
The first step in Storage-mod Supermax Ultra 2013©, was something as innocuous as clearing some space on the roof rack for the kayak.
Remember kids, just say no to Mods; you think you can say no, that you can stop at any time, but its all lies. First, you start with making space on the roof rack, and then next thing you know, you done something terrible! Like this!


And then, you will start "visiting" your "friend" named "Randy" to "borrow his sheetmetal break". The horror! Before you know it, you could come home with a steel box like THIS!

And next thing you know, you are neglecting your responsibilities and spending all afternoon bolting the box to your vanagon! (There will be stupid Mexican dirt getting in your eyes the entire time, too.)


And when the Mods have run their course, you might end up smuggling contraband (like fruits and vegetables) across the Mexican border. Who knows where these Mods could take you?! Guatemala? Costa Rica? Or even (GASP!) Panama!
Mods are a serious problem affecting millions. For more information on Mods please visit your local hardware store.
In an effort to maximize our storage, and reduce rooftop clutter (as well as the whistling from pour spouts), we decided to do away with our rooftop gas cans and find a way to add fuel reserves elsewhere. The containers in question are the red objects are on the roof to the right in the following picture.

Adding/carrying fuel is no simple matter. The fuel cans cannot be carried inside, as leaks or off-gassing are not acceptable for a living space. Mounting them to the vehicle is an option, but they need to be readily acceptable, and if they are mounted externally, they must be DOT-approved containers.
After a few days of measuring, googling, and much consideration, I decided to mount an auxiliary fuel tank. Since the space under the sliding door was now occupied by the results of Storage-mod Supermax Ultra 2013©, the only other reasonable option was the area above the transmission, and below/behind the rear bench seat.
After reviewing a fantastic number of tanks, fuel cells, and custom solutions,

I decided on a plastic cylindrical tank. I thought I might be able to install this tank without removing the transmission. I was incorrect in this guess however, and I would have been a bit better off going with a tank similar to the black one above.


I ended up having to drop the transmission to install this tank. Which ended up being a good thing, as my throw out bearing was wearing very quickly.

Here is our old friend, the 091 DK code 4-speed transmission. You will remember him from such adventures as Transmission Mission, and 74 Pounds of Joy

I must have messed something up on my previous clutch install, as the throw-out bearing was pretty worn. I ended up replacing the clutch "while I was in there" (a very dangerous phrase indeed), and fixing a small oil leak.
With a surprising amount of shenanigans and tomfoolery, I was able to finagle the tank into its intended resting place on the engine firewall.

A few holes and some bolts, and the mounting brackets are secured.
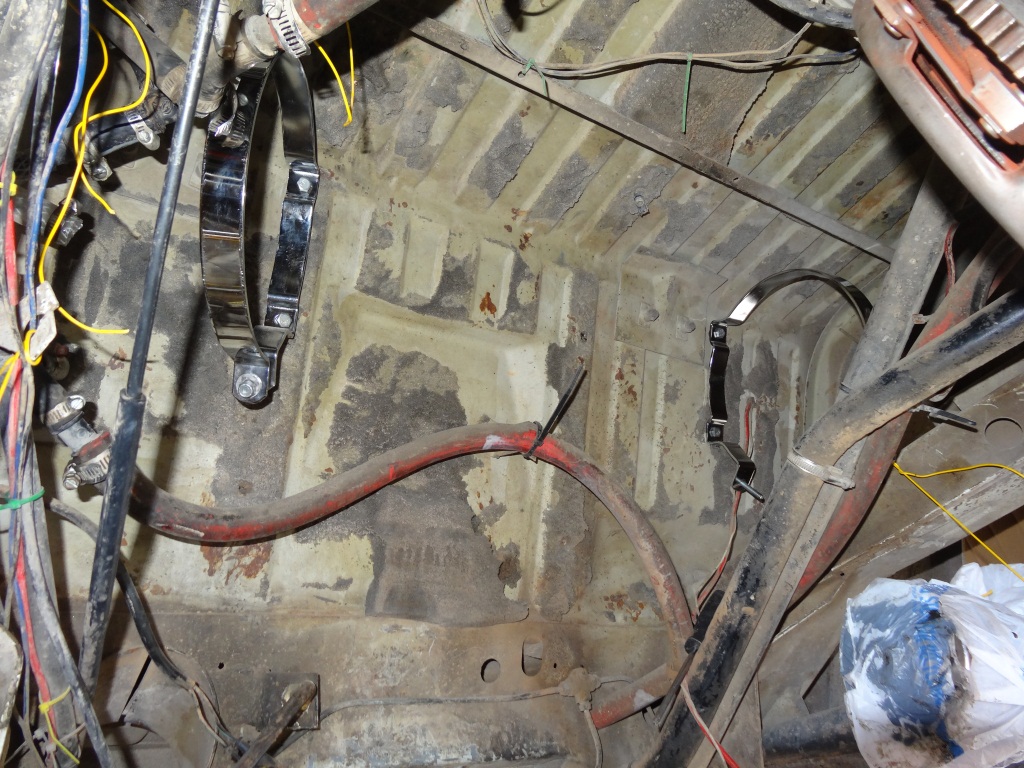
The plan is to use a spare fuel pump to lift fuel from the main tank to fill the AUX. A hand valve can then be opened to allow gravity to feed the fuel back into the main tank. A vent line plumbed into the main tank's evap system prevents overfilling. The total capacity is around 6.5 gallons.
These are the mods that I completed over the last few weeks. Jen has done quite a few herself, and will be posting about them soon.


